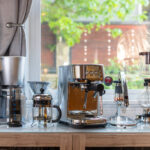
Using a Siphon Coffee Brewer
Siphon Coffee Brewing doesn’t have to be complicated to produce a superior tasting cup. Just make sure you start with fresh roasted coffee, clean water, and clean equipment. Here’s our simplified step by step guide. If you want to learn more about how these devices actually work, scroll on.
Time Needed: 5 minutes
Total Cost of Equipment (not including grinder) $ 75
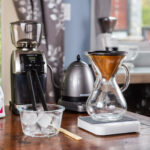
Necessary Supplies
Recommended Tools
Steps for Siphon Coffee
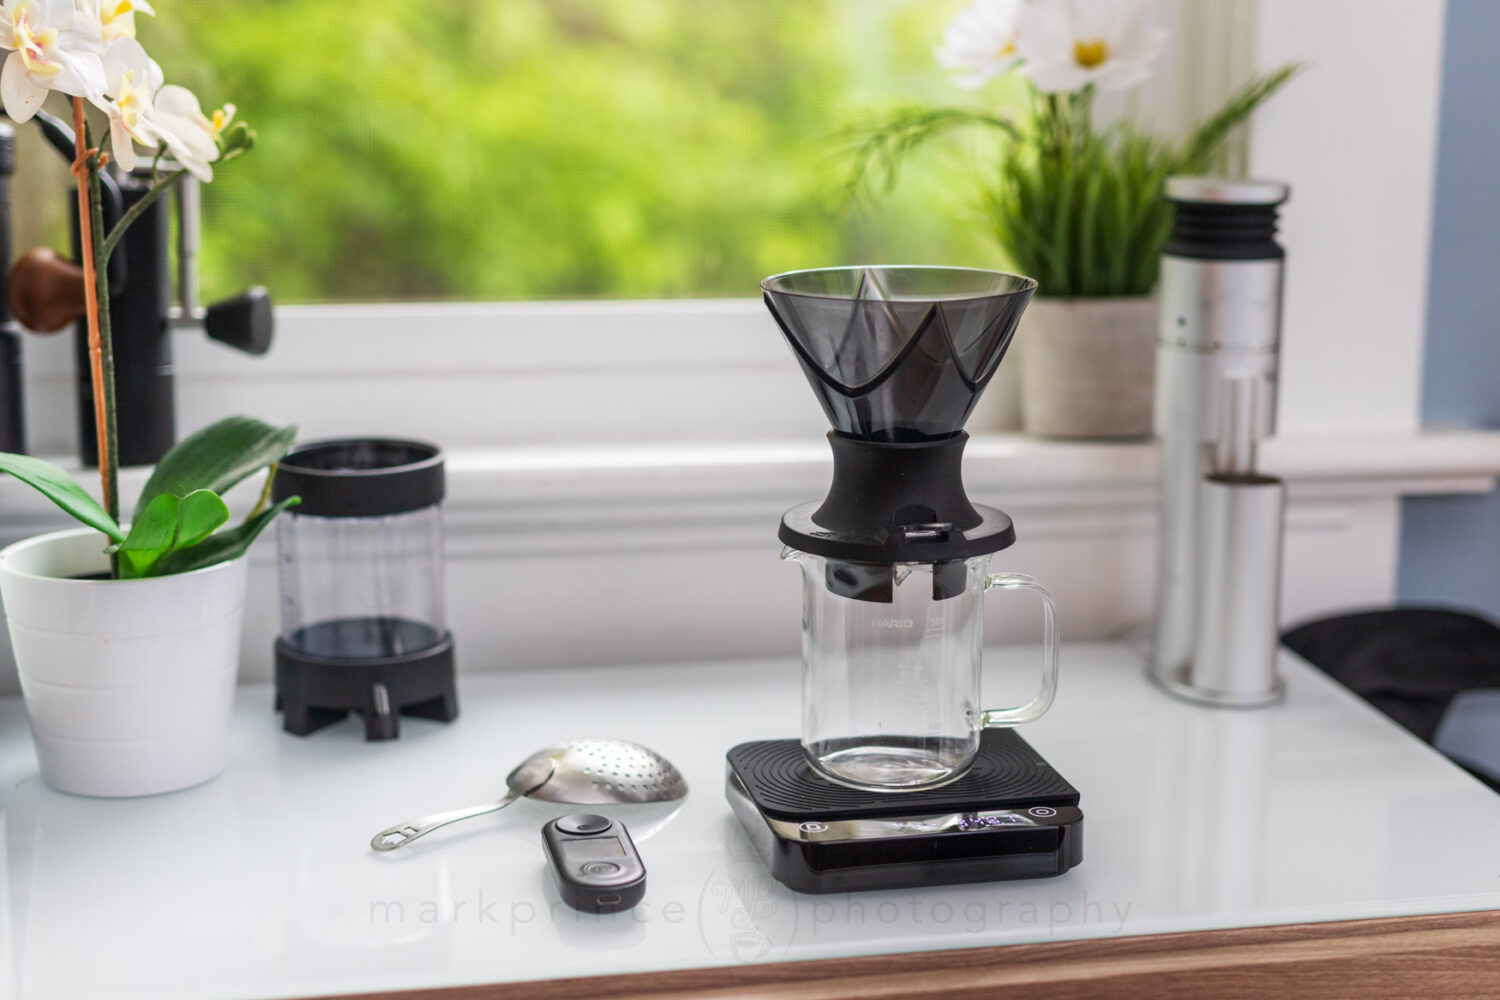
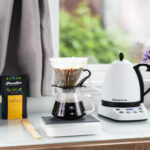
Add Water to Siphon Base Vessel
Your water can be preheated or cold, but make sure it is filtered for best results. Measure your water in to the bottom portion of the siphon brewer, keeping in mind that a ratio of 7 grams of coffee per 100ml of water is an ideal brewing ratio. In this 3 cup brewer, we’re measuring out 350ml of pre-heated water, and plan to use 25g of coffee.
Apply Heat to Siphon Base
Most siphon coffee brewers come with a cloth wick burner which is perfectly fine to use (with methyl hydrate spirits); but using a butane burner like this one speeds up the brewing process and allows more control over brewing temperatures. Place your burner under the bottom siphon bowl. (If you’re using the cloth wick alcohol burner, make sure your wick is about 5-10mm away from the bottom of the glass). Fire up your butane burner and let the water in the bottom globe of the siphon come to a boil.
Add Filter to Top Siphon Section
Our siphon uses a cloth filter, which is extremely important to keep clean and sanitary between uses. Insert and attach your siphon brewer’s clean filter into the top glass portion. Make sure the spring catch is attached to the bottom of the siphon, and the cloth filter is flat.
Attach Top and Bottom Siphon Sections
Once the filter is securely attached, insert the top part of the siphon into the bottom glob (which contains water at this stage). Make sure the gasket is sealed; it doesn’t have to be super firm, but make sure you have created a good seal.
Add Coffee to Assembled Siphon
A lot is about to happen; as the water in the lower bowl heats up, grind your coffee to your required dose (we recommend 7g per 100ml of water used). Eventually, water will move to the top portion of your siphon (steam will push it up!), and this is when you add your ground coffee to the water in the top vessel.
Stir the Coffee
As soon as you see most of the brewing water has reached the top vessel, and you’ve added your coffee, give the mixture a good, controlled stir to fully saturate the grinds. If you’re using a metal spoon exercise extreme care (we’re using a bamboo wood stirrer here; it’s best to use a wooden spoon or paddle). Just a few quick stirs to incorporate the coffee into the hot water.
Time the Brew
Grab your smartphone or look at your watch and start a timer. Brewing times vary with the size of a siphon, but we like a full immersion contact time of 90 seconds with this three cup model (try 100 seconds with a 5 cup model).
Optionally, you can give the coffee slurry one quick stir just before your timer runs out.
Remove Heat Source
Once your timing has ended, and you’ve optionally given the coffee slurry one quick stir, remove and turn off your butane burner (or put the cap on your cloth wick methyl hydrate burner) and get ready to watch science happen.
Watch Coffee Filter Down
This is one of the two fascinating “science” parts of this brewing method. With the removal of heat, steam stops being produced in the lower vessel, and indeed, the gasses trapped inside that chamber contract and phase change back to water, creating a vacuum. That vacuum pulls all the liquid from the top chamber through the filter, back into the bottom chamber. The suction is such that it will “vacuum” the spent grinds dry.
Remove Top Chamber and Serve
At this stage, it’s time to separate the two parts of the brewer. You do so by gently rocking the top brewing chamber back and forth until you feel the seal break between it and the bottom globe. Place the upper brewing chamber in the included lid/stand, and pour your coffee out and enjoy! Be careful though, it’s very hot, hotter than most other brewing methods.
Siphon BrewersHow They Work
A siphon coffee maker works on the principle of expansion and contraction of gases — actually one gas, water vapour — that allow the device to brew a full infusion style of coffee and filter the grounds efficiently, leaving a generally clean, pristine cup.
Siphon coffee makers are made up of four parts:
- the bottom container (or vessel, or “bottom chamber” or “bottom globe”l) where the water initially sits and the brewed coffee eventually rests;
- a top container (or vessel, or “top chamber” or “brewing chamber” or even “siphon chamber”) that has an open ended siphon tube attached to it, where the coffee brewing takes place; it’s the vessel with the siphon tube attached to it;
- a type of sealing material (usually a rubber gasket) to help create a partial vacuum in the lower vessel while brewing is taking place; and
- a filter, which can be made of glass, paper, metal, or cloth.
There is also a heating source needed, and there’s usually three readily available types: a cloth-wick alcohol burner (slowest); gas or electric stovetop (faster); or a specialty butane burner (fastest). There are also fourth heating source found often in Japan and some high end coffee bars: halogen light heating devices designed for siphon coffee brewing.
When the bottom globe of the siphon coffee maker is filled with water to a specific level, then heated up, eventually the water will start to vaporize into steam. Steam is what makes everything happen in this brewing device. Steam forces liquid water (at near-boiling temperatures) up the internal siphon. Steam keeps the brewing chamber’s action at optimal brewing temperatures. And the reduction in steam (and it’s conversion back to water) helps the “vacuum” stage of the brewing process, where your finished brew is drawn back into the lower chamber.
It’s always been fascinating how this brewing method was designed in 1840 in France. Even more so that it was the preferred brewing method in millions of American homes in the 1930s. With very few improvements (like safety glass), this brewing method, and its design remains largely unchanged to this day, but still looks like super science coffee brewing.
For this how to, we used a Hario Technica 3 Cup brewer which retails for around $70, but you can find nice 5 Cup Models by lesser known brands for under $45.
We’re also using an aftermarket butane burner for this guide. It allows for much better control over the brewing process, and speeds up the heating of the water. Butane burners can cost as much as $100, or as little as $30 (like this one).
For the amount of coffee to use, stick with our tried and true ratio of 7 grams of coffee for every 100ml of water used. Don’t have a scale? A very slightly rounded tablespoon of ground coffee is about 7 grams. A 3 “cup” model siphon can brew about 350ml of coffee (maybe 400ml to the max). To keep things simple, we measure out 300ml of water to use, and 21g of coffee, ground slightly finer than drip.
Siphon BrewersAdditional Tips
We’ve covered how siphons work, and given you a step by step guide. We didn’t provide much in the way of measuring, of exact timings, or even demanding you grind literally just before infusion starts (though you really should do that!) because the goal here is to get you using one of these devices in a simple, straightforward way, while still understanding what is going on and what the potential pitfalls (and rare dangers) are. Follow the above simple steps, and you’ll end up with a really good cup of coffee that was superchic to watch while it happened.
Even though we’re striving to keep this how to guide simple, there are some absolute cardinal rules about good coffee you must follow:
- Use fresh roasted, freshly ground coffee. There’s no getting around the fact that coffee is a perishable product, and the best results in the cup come from coffee that’s been roasted within the last few weeks, and is ground just before you start brewing.
- Use good quality coffee. You’re making siphon coffee here, and Costco coffee isn’t going to cut it.
- Use good quality water. Some of us are blessed with having awesome tap water. Many are not. Use a Brita filter or similar to pre-filter you water before brewing. It makes up 95%+ of your coffee.
- A quality grinder is an absolute must. For this article, we’re using the veteran Baratza Virtuoso+, which has been around for well over a decade, but has also seen many improvements and tweaks over the years, making it an amazing all purpose grinder.
You might be thinking that siphon brewers are expensive. Well, they can be. But you can also pick up some very inexpensive stovetop and 2 or 3 cup standalone models for well under $50 these days. And guess what: these $30, $40, self contained siphon brewers brew pretty much exactly the same way that $150 Hario Nouveaus, on $400 Halogen Burners do.
ConcludingThoughts
And that’s really all it is to brewing with a siphon coffee maker, at least at a basic level.
Of course, there’s a lot of advanced things you can do with a vacpot. There’s world championships for siphon brewing and a lot of very interesting techniques were born out of that competition. We will be re-doing our entire Master Class on Siphon Coffee (at some point!) on CoffeeGeek, and hope to bring you a lot of interesting and diverse information about this brewing device.
We also have a lot of current content about siphons up on the website, if you want to read more. Our blog contributor Allison wrote about her dive into siphon coffee brewing. We show you how to build a pretty upscale travel setup for siphon coffee. We also reviewed one of the most beautiful and functional siphon coffee makers ever sold.
And still more is to come!
Support CoffeeGeek
If you enjoy and learn from this resource, please consider making a one time or recurring donation to help support our work and fund purchases for future reviews.